If you record videos for your class and upload them to YouTube, you have an accessibility tool for creating closed captions.
If you do not have a YouTube channel, it’s free and easy to get. Use the same log-in for YouTube that you use for your Gmail or any other Google account.
Here’s How to Provide Closed Captioning
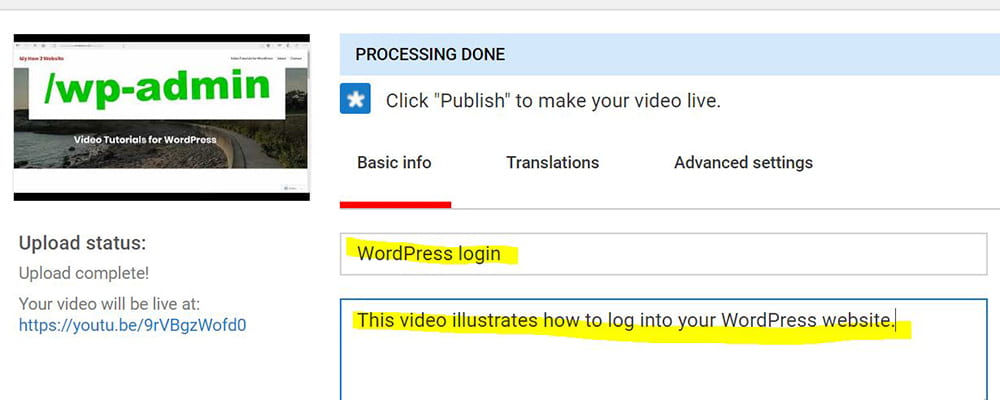
When your video has finished uploading, YouTube will give you a screen to add a title and description of your video.
First enter a title and description for your video.Then click on “Publish.” |
 |
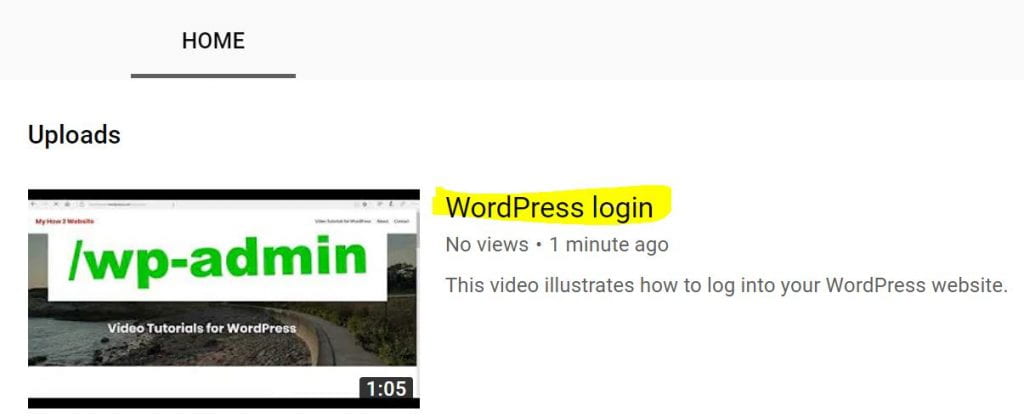
Then click on the title of your video. |
 |
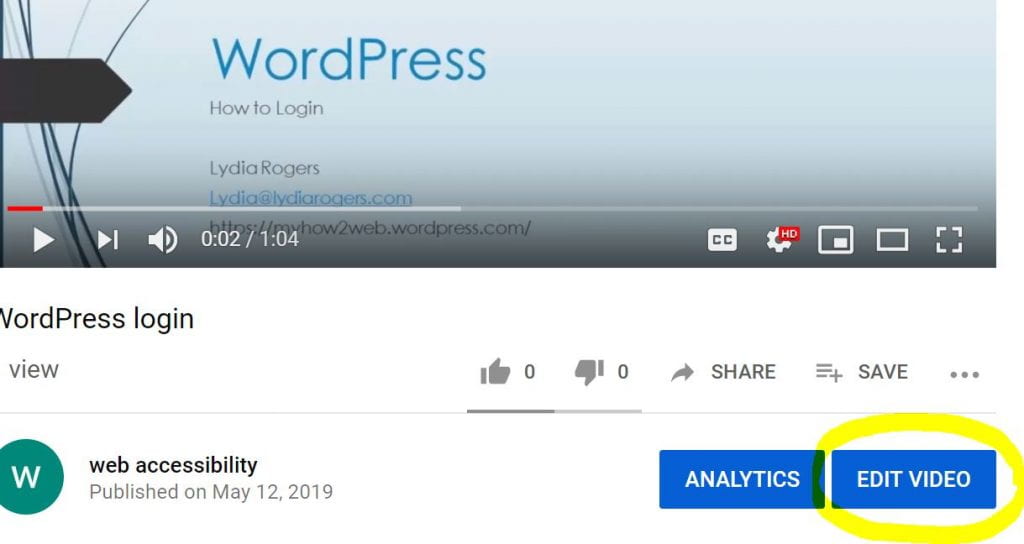
Choose “Edit Video.” |
 |
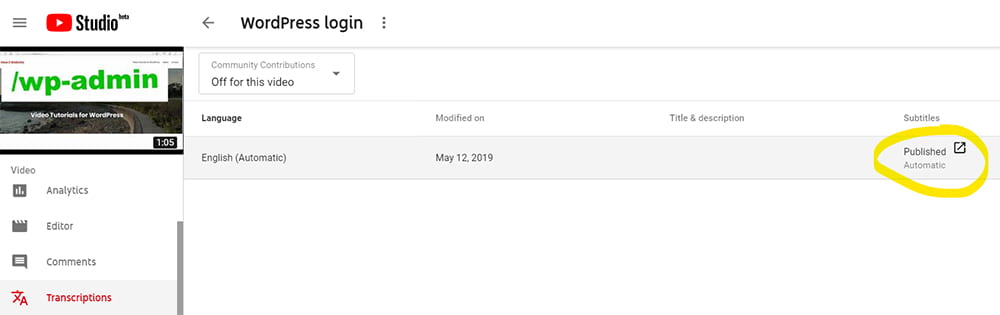
The next step is to click on “transcriptions.” |
 |
Underneath “Subtitles,” click on “Published Automatic.” |
 |
This will take you to the transcriptions page.Click on the “edit” button. |
 |
YouTube makes a first pass at closed captions.Go into each section and make any updates. |
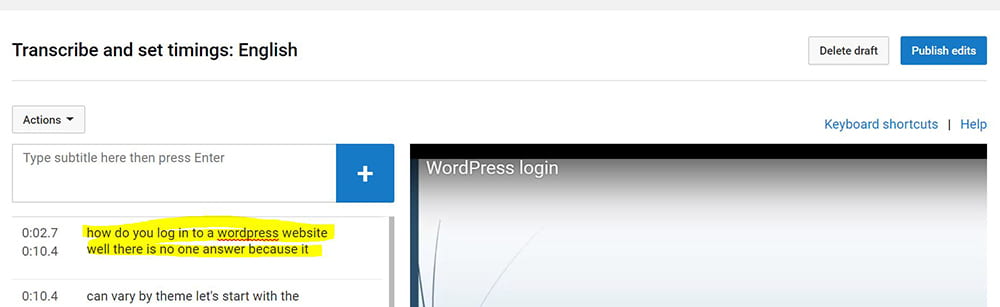 |
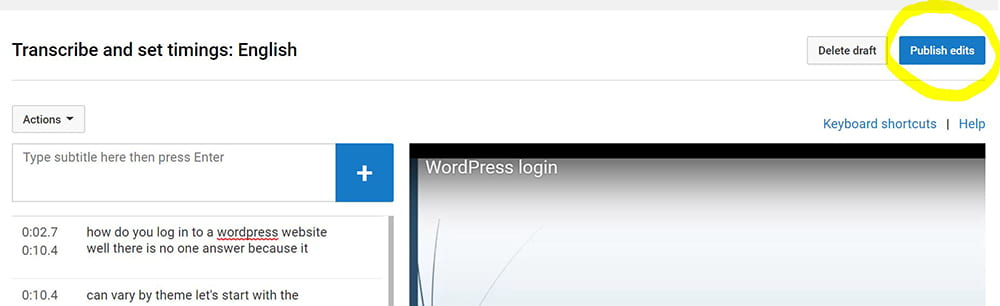
When you have made all the edits, click on “Publish.” |
 |